|
Page 2 The project begins |
|
Time for the steering shaft.
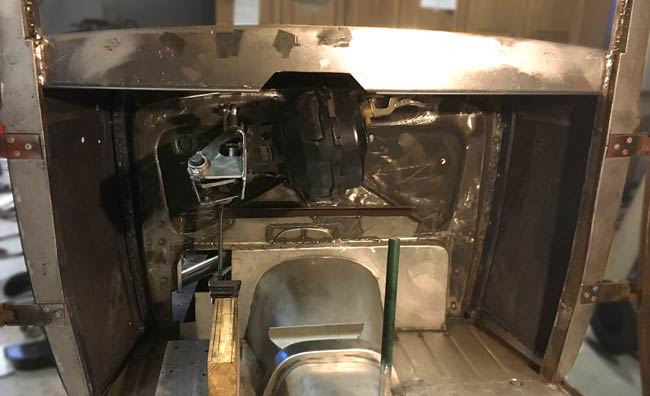
A hole was cut in the firewall to get the steering shaft through and into the cabin.
|
|
|
|
There isn't much room for the brake and throttle pedals, so the steering
shaft was moves as far left as possible. Now we have a huge hole in the firewall.
|
|
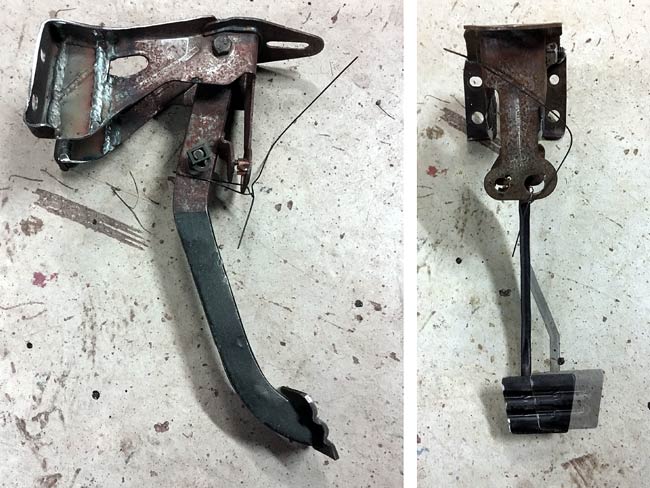
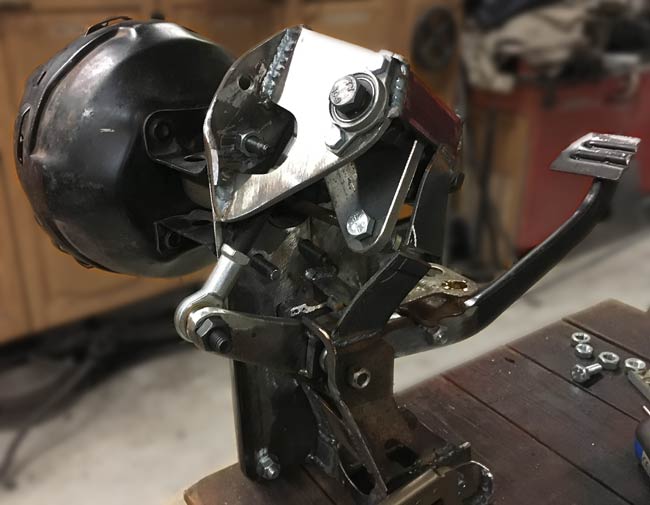
The brake pedal is a modified one from a 1987 Trans Am that was parted out over a dacade ago.
|
|
|
|
Bolt in/weld on brackets were made, so the whole assembly can be removed with four bolts. There will aslo be a bracket where it bolts to the dash.
|
|
Here a hanger has been made at the master to booster bolts as per original TransAm, it's just anchored to the dash with vice grips for now. |
|
|
|
A tilt column was cut down, and a '56 Chevy steering wheel was hung from the roof in approxemately the right position. All the ergonomic measurements off my '84 Caprice, since it's pretty comfortable. |

|
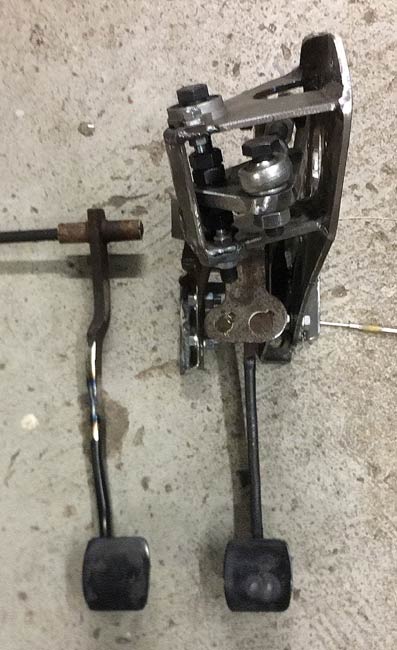
The brake pedal is from a car with an automatic transmission, so it was cut it down a bit earlier. New pedals were cut out of a junked Saab 9000 and just the brake pedal "blade", the part that the pedal rubber pad attaches to was welded to the TransAm pedal.
Then, a brake pedal from a seventies Dodge was cut so that
the clutch pedal from the Saab fit, the parts welded toghether, and the overall length of the pedal is now the same as the GM brake pedal.
|
|
|
|
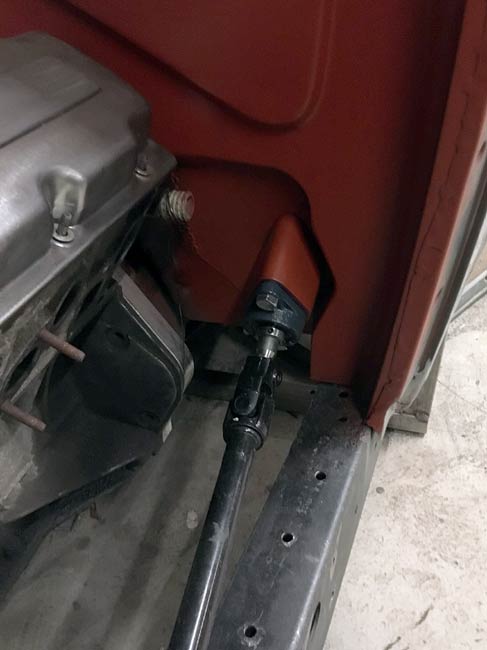
A flange for mounting the clutch master to the Dodge brake mount was made . |
|
A tube was welded in between the A-pillars. Then a column drop
mock up was made from 1/8" plate.
The tubing and the other unsightly stuff will be hidden by a later era style dash some time in the future. |
|
|
|
The column was cut loose off of its drop mount, the position of the steering shaft was moved to the left by about 3/4" and the culumn turned a bit so the steering shaft points a bit to the left, and the wheel is again straight. Using the tilt column really is a saver.
Then the column was welded to the drop mount in its new position. |
|
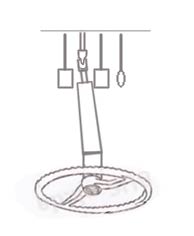
This sketch shows how the tilt function was "misused" by rotating it. |
|
|
|
The clutch pedal mount trial fit into its position. The Dodge brake pedal mount is now hung off two mounts, one still to make and weld to the firewall. The brake pedal assembly has gotten a rear mount aswell. |
|
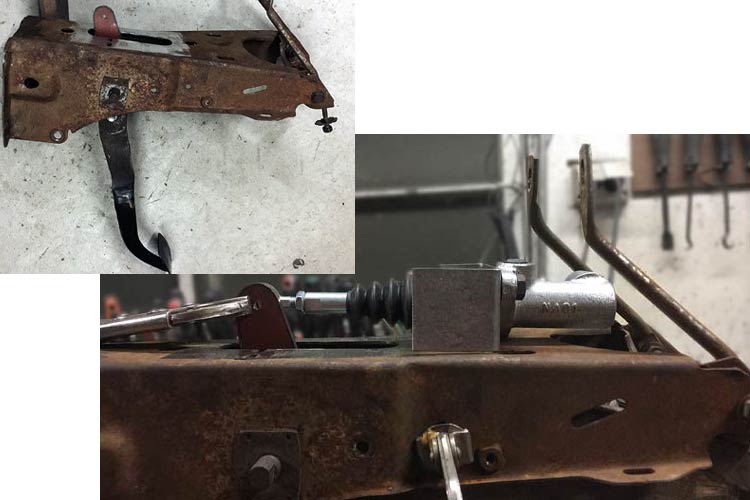
Some of the old mounting points were cut away and holes were drilled for the last mount, then the clutch master flange that was made earlier was welded to the top of the pedal mount.
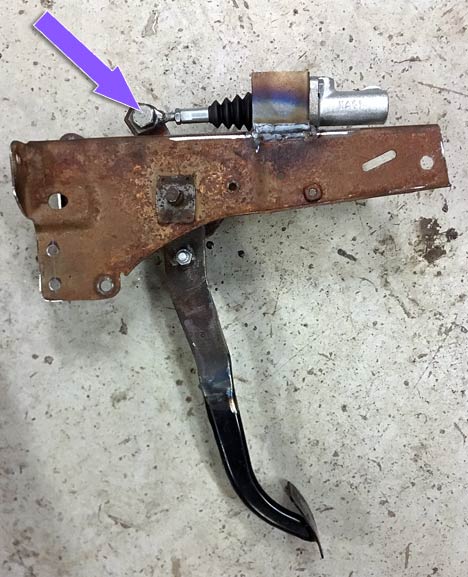
The eyelet from the Dodge brake push rod (Arrow) was used, and welded to an M8 bolt
with its head off .
|
|
|
|
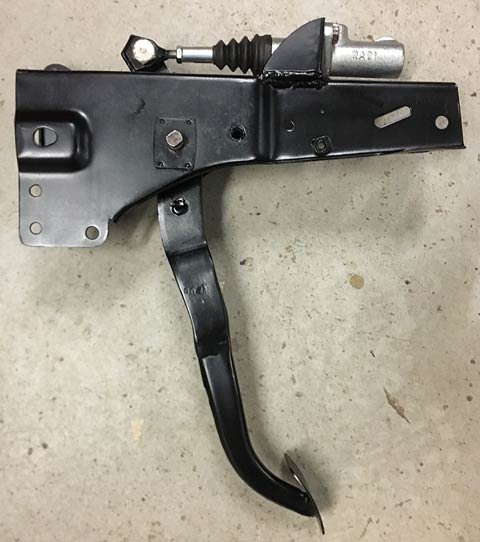
The clutch pedal assembly sand blasted and painted.
|
|
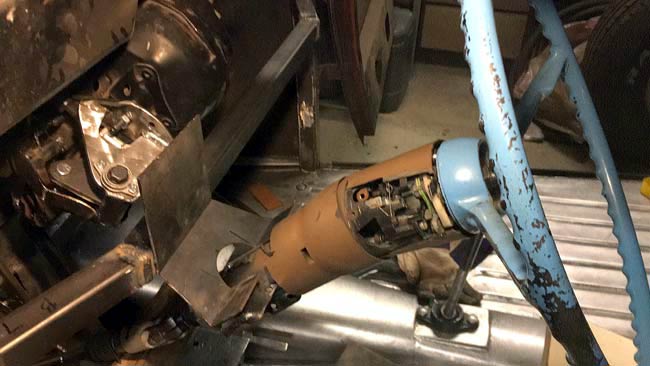
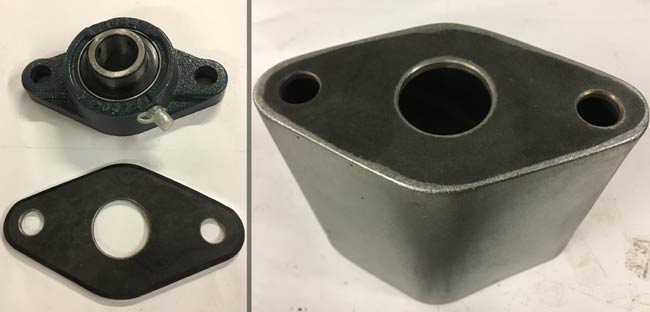
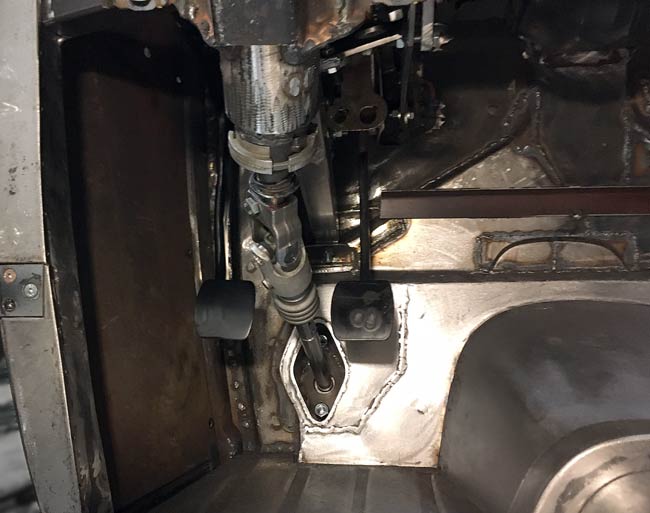
The final part of the steering is the lower steering axle bearing.
|
|
|
|
The steering axle housing was then mated to the firewall, making a somewhat suitable cut out for it, then painted with rattle can primer.
|
|
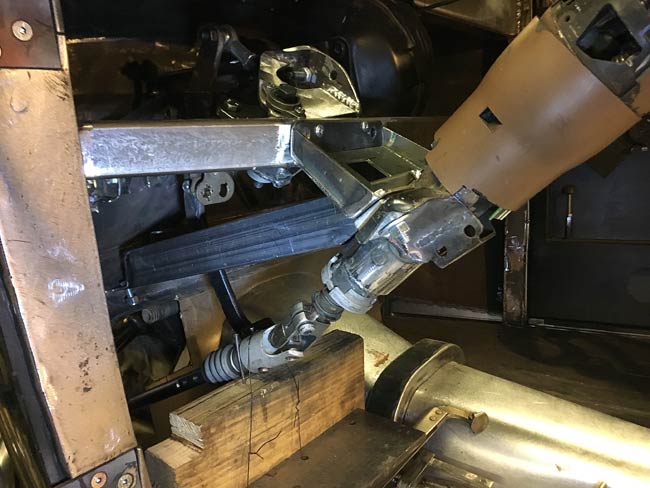
Pedals and steering axle finally in place. |
|
|
|
The brake master still hadn't been test mounted, and of course there was some cutting to
be done. The cut was made as high as possible, and the result is a 3" space above the
master brake fluid container for filling fluid, so that's going to work.
|

|
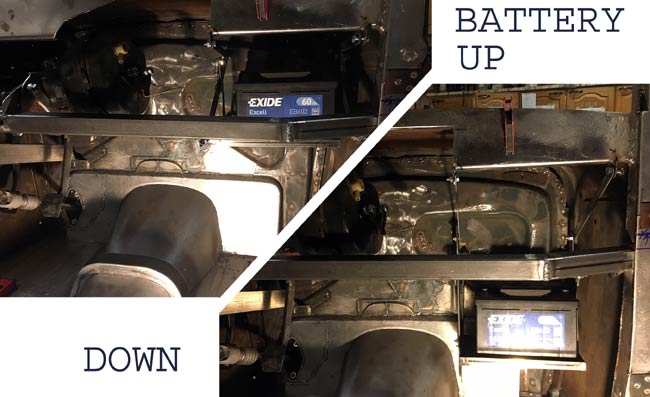
It was deciced to mount the battery under the dash. To make the battery somewhat easy to get in and out, it needed some kind of "elevator" thing. A mechanism was made, and now the battery can be lowered about eight or nine inches, for easy installation. |
|
|
|
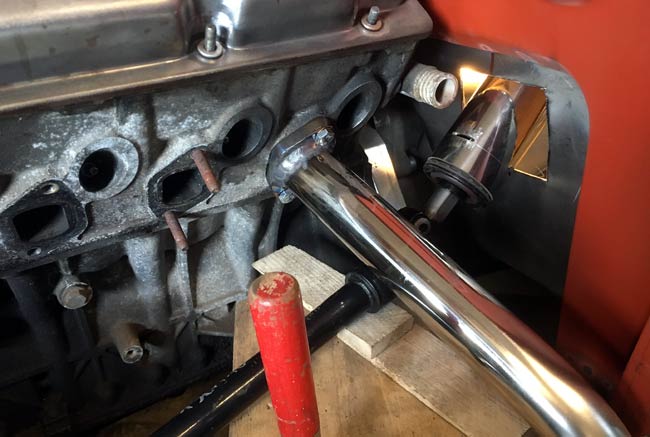
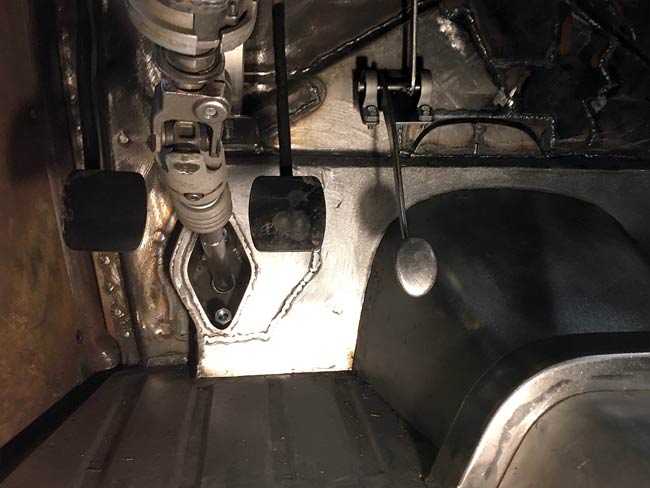
The pieces for a gas pedal was cut from a side of a big piece of tubing with 3/16" walls. The oval part or the pedal was hammered to a curved shape, Some welding and filing was also involved. |

|
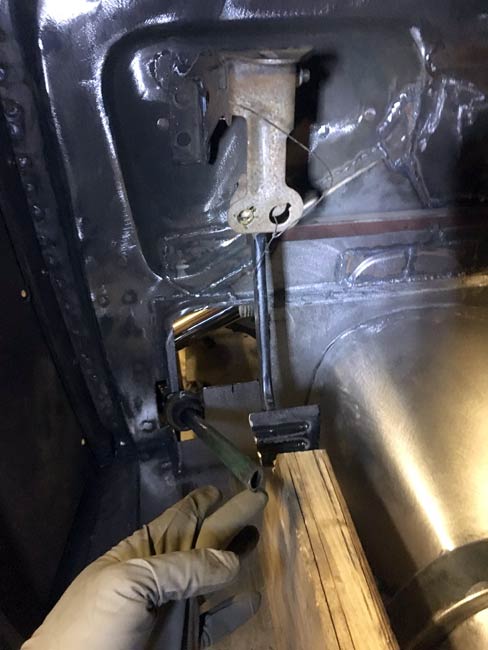
A piece of 3/8" diameter axle stock, bearings to go
with it, a bracket and then the gas pedal was tacked ot the firewall.
|
|
|
|
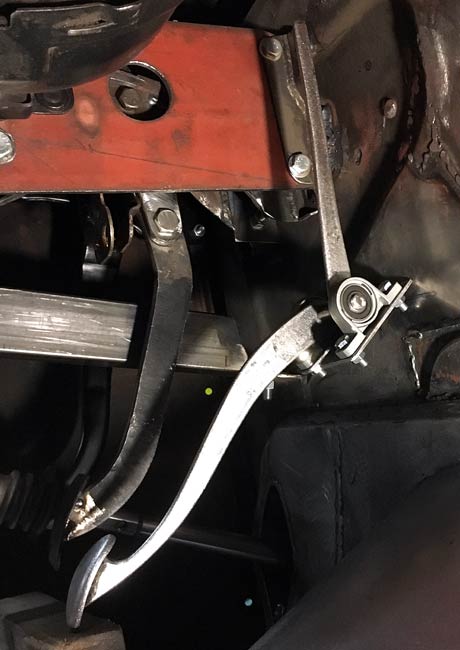
This is what the pedals look like now. Sitting there pushing the pedals, it all seems pretty good, so the gas pedal bearing bracket was finish welded to the firewall. |
|
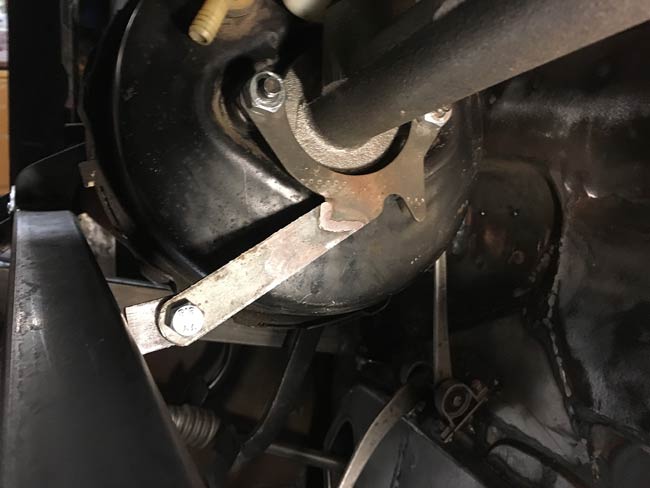
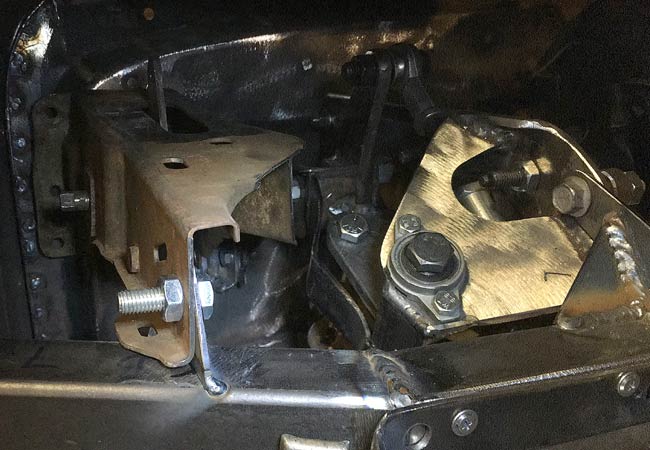
The final bracket that helps keep the brake booster and brake master from shaking too much is done. That should make the pedal work done, just the throttle linkage through the firewall and on to the carbs to do. |
|